
With the upcoming Spring ’25 Release Salesforce has introduced some new features and updates in the Flow Builder. Below is the summary of some important updates with their examples that will help you in understanding the use of those features. Salesforce will start rolling the updates to your Production and Sandbox from January 10,2025. Check the Maintenance Calendar for exactly when your Salesforce org will get the Spring ’25 features. Scroll through the list and check your Salesforce instance (NA__, EMEA__) against the release dates listed in the calendar.
Guide Users Through Screen Flows with Progress Indicators
Make it simple for users to follow along in screen flows with built-in progress indicators—no need for custom coding. Users can see what step they’re on and how many are left. You can show the indicator at the top or bottom of the screen. Choose between a basic style or a path-style indicator (path-style works only at the top).
Note: Progress indicators are automatically available for flows made in Spring ’25 or later. For older flows, you’ll need to turn them on manually. They don’t work in Field Service Mobile or Salesforce Scheduler flows. If you’re using the Actions & Recommendations component, it already shows the stages, so the progress indicator won’t appear.
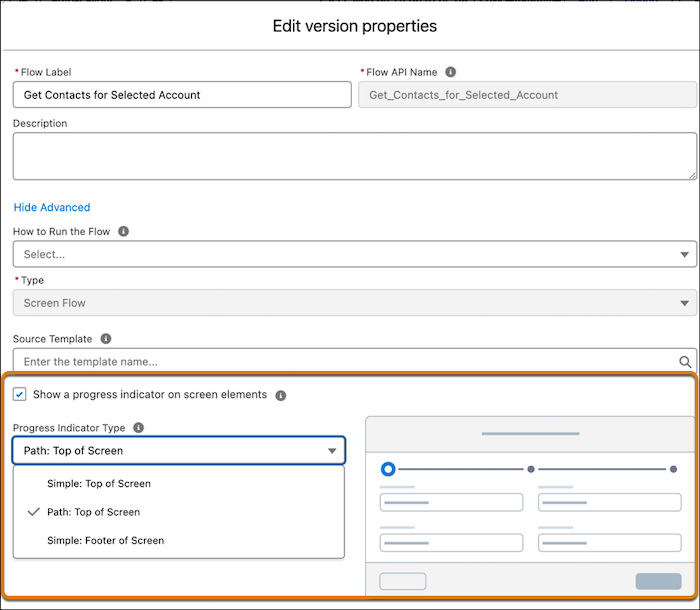
To add a progress indicator, go to the flow version settings, turn on Show a progress indicator, and pick the style you want.
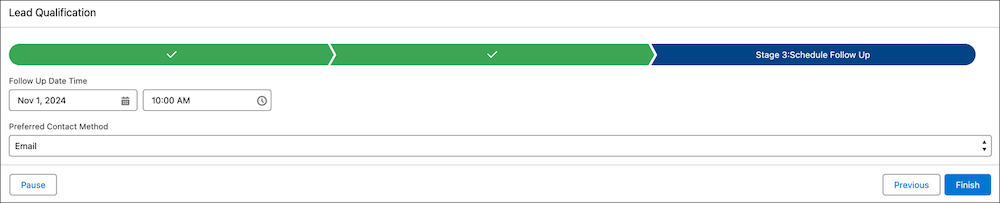
When users run the flow, they’ll see their progress.
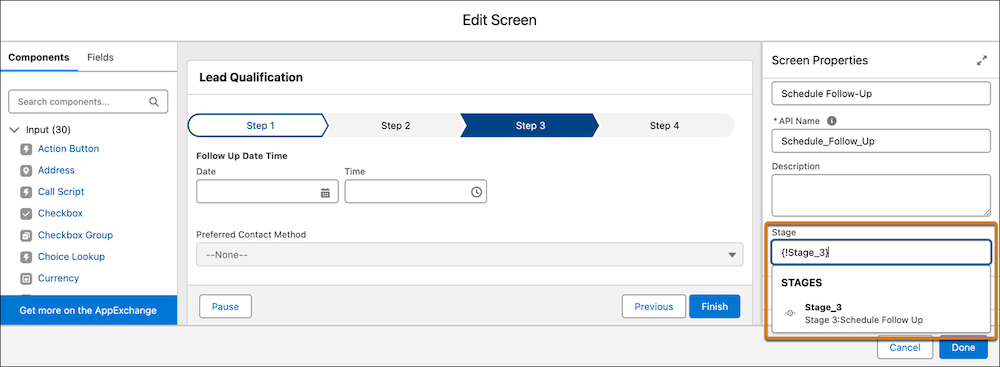
You can assign stages directly in the screen properties editor, so you don’t need to use assignment elements to set $Flow.CurrentStage and $Flow.ActiveStages. When a screen loads, $Flow.CurrentStage automatically updates to match the stage linked to the screen. If the stage isn’t already active, it’s added to the end of $Flow.ActiveStages. Use the built-in progress indicator or create a custom one to show users their current stage and how many steps are left.
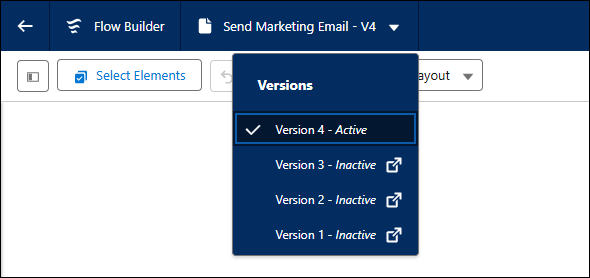
You can now manage different flow versions in Flow Builder easily. Just click the flow name in the navigation header to see all versions. Click a version to open it in a new tab.
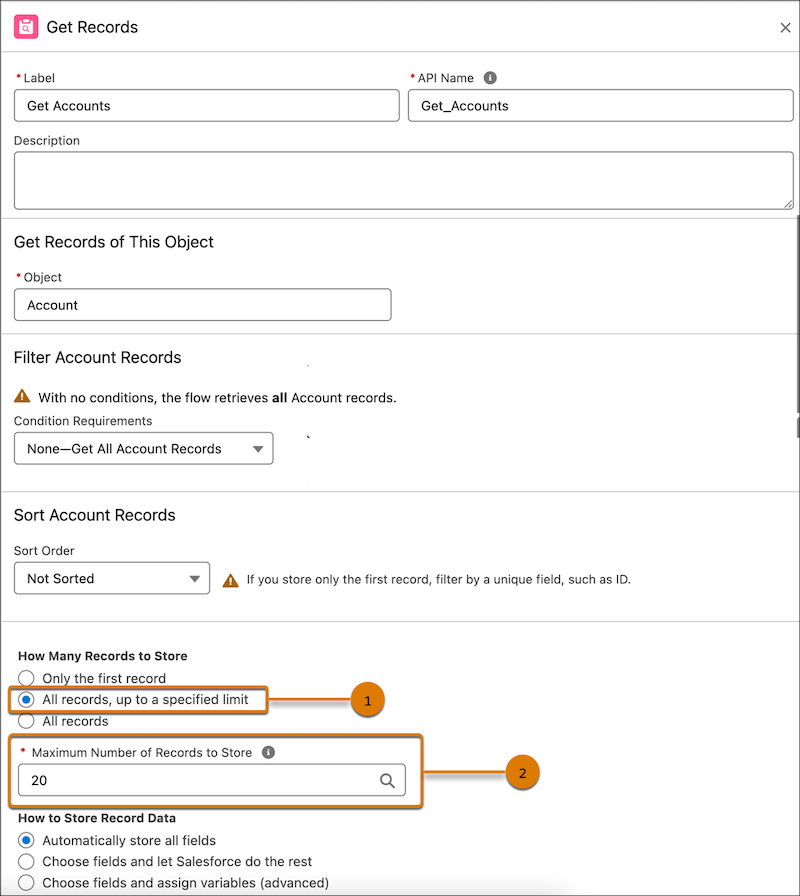
Enhance Flow Performance by Controlling the Number of Records Retrieved with Get Records
When dealing with lots of data, flows can slow down or hit limits if too many records are retrieved. To avoid this, set a limit on how many records the Get Records element retrieves. This improves performance and reduces errors.
How:
- Add a Get Records element to your flow.
- Under How Many Records to Store, choose All Records, up to a specified limit.
- Enter the maximum number of records to retrieve.
The flow will fetch only the number of records you specify.

After fetching the data into the two collections and create target collection, then configure the Joins by clicking the connectors at the top of each collection that you wish to connect. You can then map the keys and fields that you want to join.

| Command | Shortcut |
| Undo | Windows: Ctrl+Z
macOS: Cmd+Z |
| Redo | Windows: Ctrl+Y
macOS: Cmd+Y |
| Save As | Windows: Shift+Ctrl+S
macOS: Shift+Cmd+S |
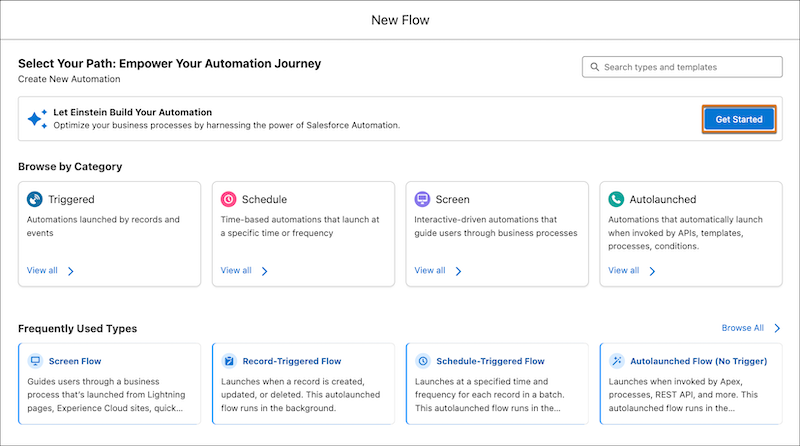
Einstein AI can now help you create flows! Just describe what you want to automate, and it will build the flow for you. This feature is now generally available and works faster and more accurately than before. You can give feedback using thumbs up or down buttons to make Einstein smarter.
How:
- Turn on Einstein AI in Setup.
- Go to Flow Creation with Einstein in Setup and activate it.
- In the Automation Lightning app, choose Get Started in the Let Einstein Build Your Automation section.
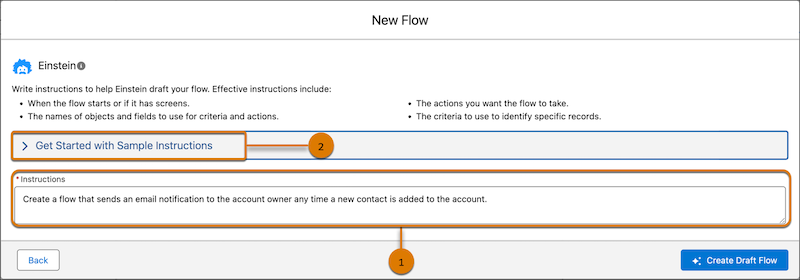
- Write instructions or use sample ones to start.
Note – Einstein will create a draft flow. Make sure to check, debug, and test it before activating.
Write instructions from scratch (1) or get started with sample instructions (2).
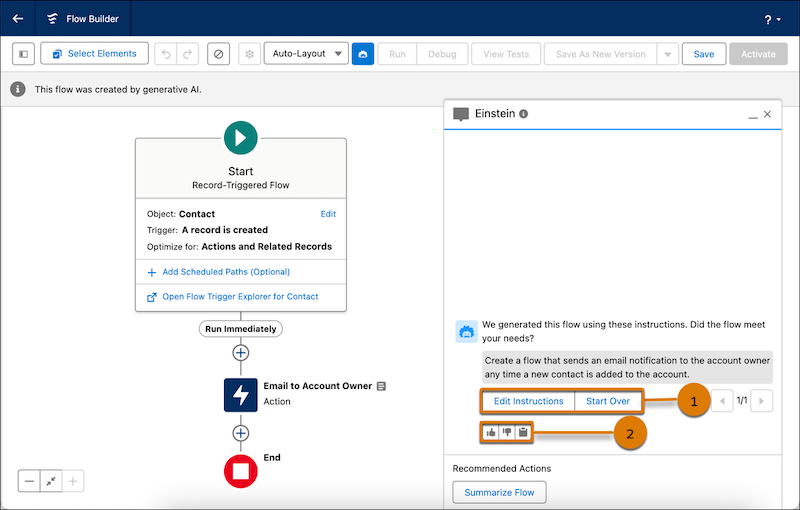
After your draft flow opens in Flow Builder, check the flow for accuracy and safety. Also, before activating, be sure to debug and test the flow.
To get more accurate results from Einstein, share your feedback in the Einstein panel by clicking thumbs up or thumbs down (1). If the flow doesn’t meet your needs, edit the instructions or start over (2) in a new window.
Get Flow Summaries with Einstein
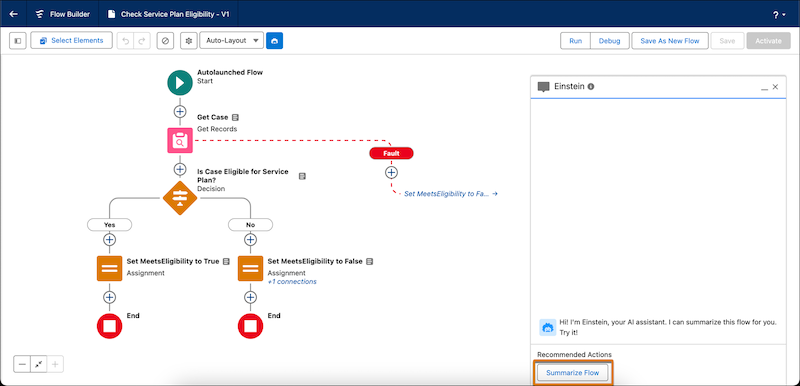
Struggling to figure out what a flow does? Use Einstein to summarize it for you. The summary includes the flow’s steps, variables, objects, and subflows. You can add the summary to the flow description to keep everyone informed.
How:
- Turn on Einstein Generative AI in Setup.
- Open a flow in Flow Builder.
- Click Summarize Flow in the Einstein panel.
You can adjust the length of the summary and add it to your flow description. If there’s already a description, it will be replaced with the new summary.
After you generate the summary, you can shorten or lengthen it (1). The standard summary provides a high-level overview and includes the objects that were modified in the flow. The shorter version summarizes the flow in one or two sentences.
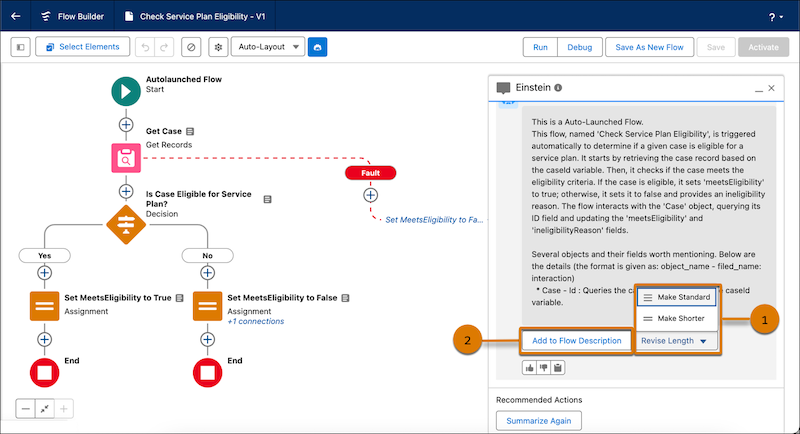
You can then add the summary to the flow description (2). If your flow has an existing description, you can update the description. Updating the description replaces the existing description with the flow summary.
Einstein AI can also help you build formulas in Flow Formula Builder. Describe what you want to calculate, and Einstein will suggest the functions and operators. Be sure to test the formula before using it.
How:
- Turn on Einstein Generative AI in Setup.
- In Setup, enable formulas created by Einstein under Process Automation Settings.
- Open a Formula resource in Flow Builder, click the Einstein button, and describe your formula.
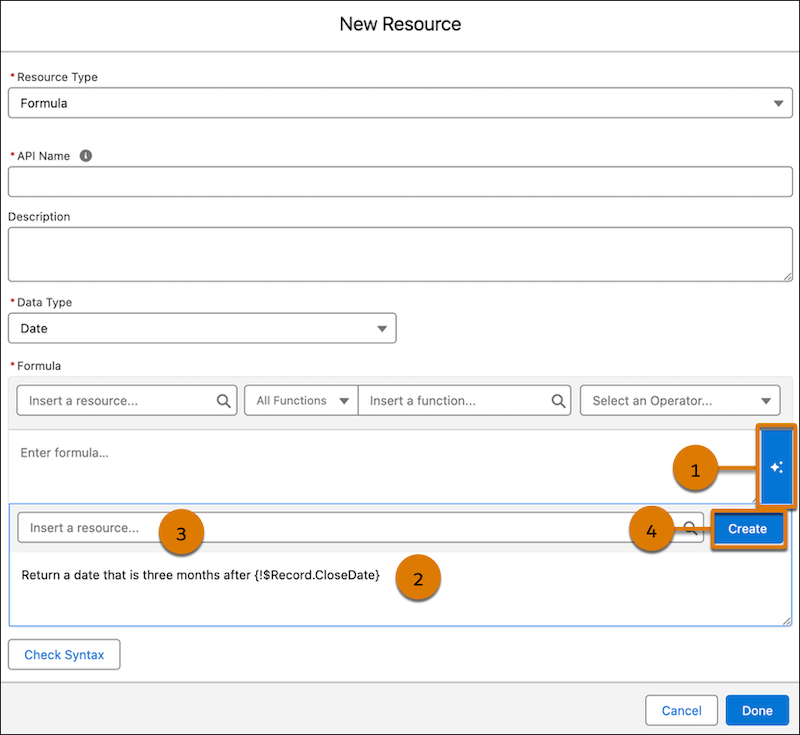
To create formulas with Einstein, open a Formula resource or an element with Formula Builder. Open the Einstein section and click the Einstein button (1). Describe the formula you want Einstein to create (2). When adding resources to your formula description, use the resource menu (3) to select them instead of manually writing them in. Click Create (4).
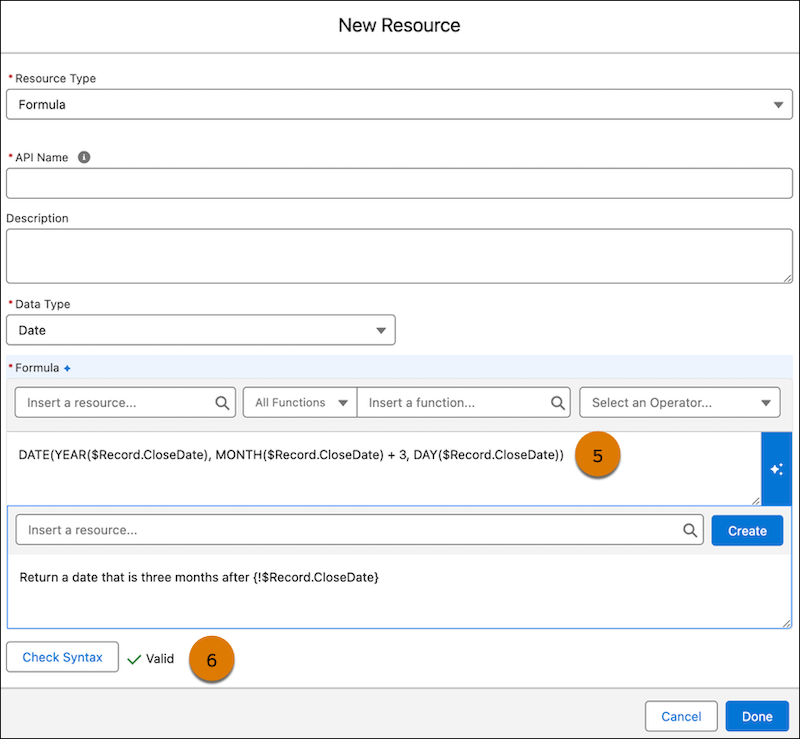
After Einstein creates the formula (5), check its syntax to make sure it’s set up correctly (6) and test your formula for accuracy and safety before activating the flow.
You can now attach files to emails sent from Flow Builder. Just provide the file’s ID, and it will be included in the email. The total email size, including attachments, can be up to 35 MB.
How:
- In Flow Builder, use the Send Email action.
- Turn on the Attachment ID field and add the file ID(s). You can add multiple IDs separated by commas.
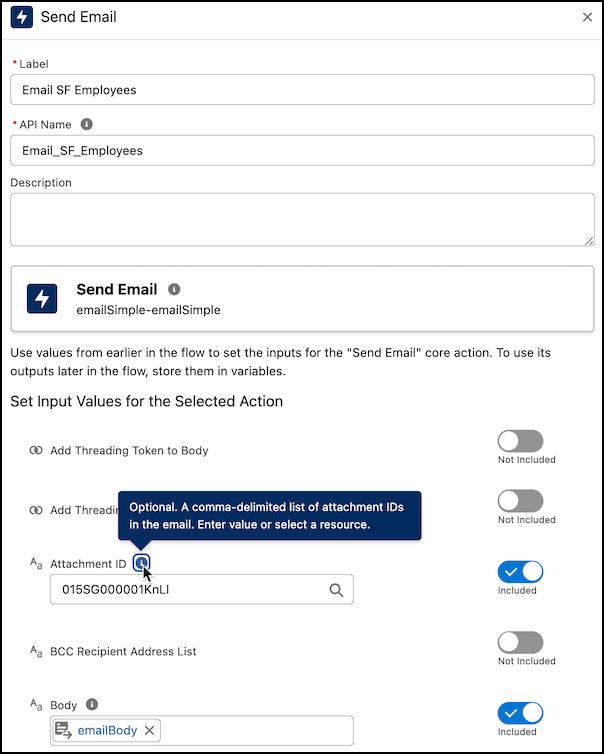
Note – Using attachments in the Send Email action changes the API called by the action, which changes the daily email send limit to the General Email Limit instead of the Daily Workflow Email Limit.
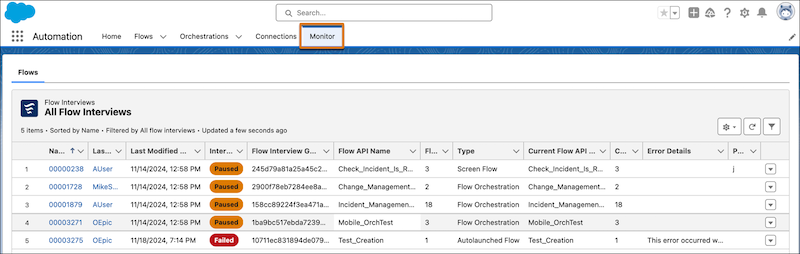
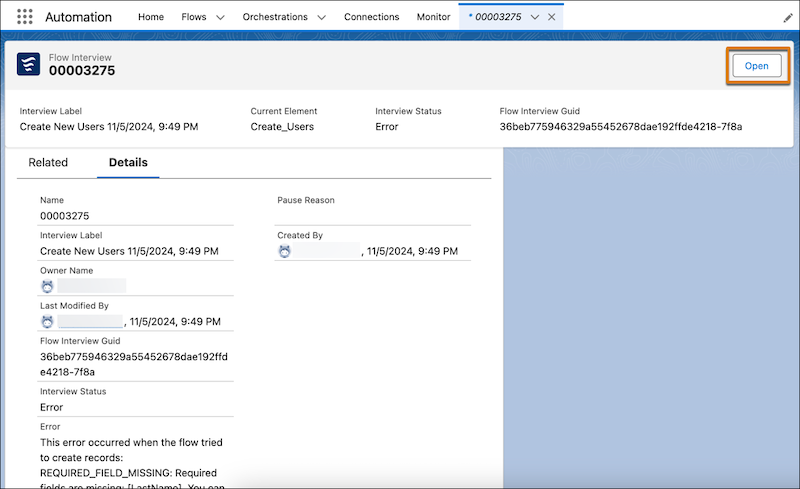
To debug a failed flow interview, on the Details page of the failed flow interview, click Open.
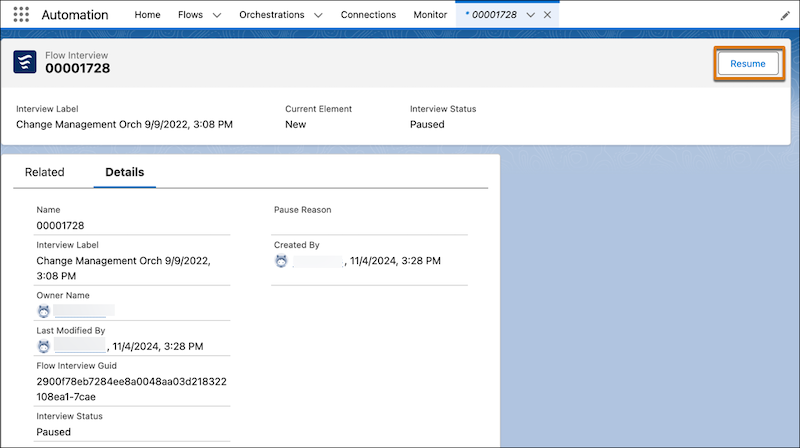
To resume a pause flow interview, on the Details page of the paused flow interview, click Resume.
Other basic updates in the flow builder
- Easily Debug Flows with New Summaries. Debugging flows is now simpler with element-level summaries. These summaries show what happened at each step of the flow. For example, in the Debug Details pane, an Update Records element will display how many records were updated after it ran.
- You now easily control run-time changes for flow. To adjust the run-time API version, open the flow in Flow Builder and edit the version properties as needed.
- You can now have unlimited paused and waiting flows, as the per-org usage limit has been removed. However, the total number is still tied to your org’s storage capacity. If you need more storage, contact your Salesforce account representative.